|
|
|
Chapter 3: Installing a Distribution3.1 Different types of Distribution and Installing with them. 3.2 What sort of computer will I need for Linux? 3.2 Installing with Red Hat Linux 7.1 NOTICE TO SLOW MODEM USERS: This page has over 21 large(ish) images, covering the installation of Red Hat Linux 7.1. Please allow good time for these to display. I have tried to squash the size of them as much as possible. 3.1 Different types of Distribution and Installing with them. As described in the previous chapter, there are lots of different types of Linux distributions floating around, and yes, this generally means that they all have different Installers to put them onto your PC, Mac or Alpha based computer. This chapter focuses on installing an RPM based distribution, but gives a short insight to distro's that arent You may be wondering what RPM is. Well, RPM stands for Red Hat Package Manager and files that have a .RPM extension (for example gimp-2.05.i386.rpm) are packaged binary files (sometimes they package source code as well). The point of all this package business, is that it means that installing something under Linux, whether it's a whole operating system, or just a simple program, can be done with a click of the mouse, rather than typing lots of stuff in to compile a program. The below table shows a few common distributions, and details whether they are RPM based distributions or not.
I would, however try to avoid a distribution that uses .tar.gz files only as it's distribution method. 3.2 What sort of computer will I need for Linux?  "Only Kidding!" This question has a lot of answers. The bottom line is: Depending upon what you want to do with Linux, the system requirements can range from an old Intel 386 to a state of the art Pentium 4. For an apparently impartial guide of compatible hardware for Linux, why not check out this short guide, submitted by Don in our forums. Click HERE to visit it. You need one of the following types of computer CPU to use Linux:
Most Modern day Linux distributions will require a minimum of around 32MB to use it to it's full advantage, but if you can live without X Windows and other (probably graphical) aspects of Linux, you can run a basic installation of Linux on just 4 MB RAM. Some stubble-faced linux geeks have got the OS to run on 640K RAM on an old 8088/86 XT! If you're going to be serious about Linux, and want optimal performance, then as with any software, the more RAM you point towards it, the better it runs. Ideally, if you reckon you're going to be a home user, 128MB RAM would be a good figure to live with. If you want to be a server or want to do demanding stuff like perform intricate artwork in the Gimp or something, then we're probably talking about 256MB+. Linux 2.2 supports up to 2GB of RAM, and the latest Linux Kernel, 2.4 supports some rediculous figure like 60GB (possibly more). If you've got RAM, you can bet you're bottom dollar bill, Linux will use it! In fact, if there is something Linux likes the most, it's RAM.
As with all things Linux, it's possible to do it in the smallest of setups. Using distributions such as ZipSlack, you can achieve a fully working Linux setup in just under 100MB. For those who don't even have 100MB of storage space, searching through a place like www.freshmeat.net will find you a good deal of floppy based mini-distributions. These are very cut down distributions, usually consisting of the Linux kernel, plus a few very select simple GNU apps. The bonus is that it will work from just one floppy disk. If you want to install a standard workstation installation of any up-to date distribution, you will probably want at least a 500MB hard disk drive, but in all honesty, I wouldn't like to do it with anything less than a 1GB drive. My hard drive(s) consist of lots of stuff: Linux Apps, MP3s, Documents, emails etc and I use up quite a lot of drive space, so I have a 60GB IDE drive as my main drive. Linux is just great on 4,6 and 8 GB drives. If you're just beginning with Linux and want to boot between Linux and Windows, you're probably safe to go with an 8 GB drive, slice the Windows partition down the middle (50% of the size) resulting in a 4GB partition for Windows, and 4GB for Linux. If you want to get down to doing a bit of partitioning, you may want to get yourself a copy of something like PowerQuest's Partition Magic which will split partitions of Windows, Windows NT and Linux nature up any way you want it, and is very easy to use for the beginner.
Any bog standard graphics adaptor will do for linux, and it is possible to get X Windows displaying on Monochrome displays, CGA, EGA and 16 colour VGA. Optimally though, you will want to have an SVGA adaptor in your PC that has enough RAM to support resolutions of up to 1024x768. Graphics Accellerator cards of many types are supported by today's modern distributions for even faster graphics. If you're looking for really good graphics performance under Linux, the 3DFX Voodoo Range are an excellent choice, as are the Matrox G200/G400 range. NVidia are extreemely fast and are supported under Linux, but unfortunately NVidia will not release the soruce code to their drivers, which is a poor show on their behalf. Nvidia graphics cards are usually amongst the fastest for graphics acelleration but beware driver problems on older distros.
Before I embark on a quick guide to installing with Red Hat 7.1, it's important to tell you that the principal for all other RPM based installations is pretty much the same. You set up your computer, the network, and then select the packages you would like to install (or choose a workstation/server predefined setup) and let it install. There is not much to it, and if it goes without flaw, it can be easier than Windows 95 to install. The hardest part of installing Linux is generally when Windows is involved on the same drive as you wish to install it on.
If we were to go into the fdisk program (you need to run this from the dos window), you can see that your current windows drive is using 100% of your 8GB drive. That's not good, because there is no space for Linux to go onto your drive. We need to make space! As mentioned above in the Hard Disk Drive Requirements, partitioning (or resizing partitions on your hard drive) can be done with tools like Partition Magic from powerquest.
If you don't have the cash, or don't want to shell out for something as exotic as PartitionMagic, there is a freeware alternative. Visit www.users.intercom.com/~ranish/part for the Ransih Advanced Partition Manager, which does the same thing as Partition Magic does, but in DOS text mode. It's not bad though. Lastly, you can view Robert Smiths hot-topic contribution at the Ultimate Linux Newbie guide for an in-depth guide to readying your disk with a free hard disk partitioning tool called FIPS, Click HERE to view it. Okay, when you have decided on the tool you will slice your drive with, get to work. Try and devote as much space to Linux as possible, if you have 4GB free on your 8GB drive, resize your windows drive down from 8GB to 4.5GB, leaving 3.5GB for linux. I would usually make a point on advising you to make several partitions on your new linux drive, but all we will make is two: / (the root) and SWAP (the swap partition). You can set these both up in PartitionMagic / Ranish. You want to make the SWAP partition double the size of your RAM, so for example, if you have 128MB RAM, you want to make your swap partition 256MB big. The / (root) partition should take up the remaining space. When finished, your hard drive's partition tables should look something like this:
Does your partition table look like that? If yes, good stuff, you've just combatted the point that most newbies stumble at. It's easy enough when you do it 3 times a week like me, but the first time is always daunting. INSTALLING RED HAT LINUX 7.1: Initiating Countdown, Houston! Okay. We have partitioned our drive, and we've grinded our teeth. It's time to put that there CD in the drive and reboot the PC. Yes, this means shutting down Windows (ha.. ha...ha!). When The CD boots, you will be presented with a text mode screen, saying 'Welcome to Red Hat Linux'. There will be several options, such as 'Type expert to begin in expert mode'. Unless your system has a really funky hardware setup here (Raid arrays, weird hardware that needs odd driver disks, or if you have an odd amount of RAM), you should just press RETURN. You will shortly see the Red Hat 'Shadowman' take up the background as X kicks in. The installation should be graphical from now on. Some people with funky graphics cards or cheap on-board ones sometimes have bother in getting this graphical installer to work, so if it dont, reboot, and instead of pressing RETURN at the text boot screen, type text. This will start the text mode installer, which has the same steps as the graphical one, but it's all in text mode. It's still pretty user friendly. Don't worry about that. For the benefit of those that don't have the luxury to use the graphical installer, I have taken the screenshots of the installation of Red Hat 7.1 in text mode. The graphical installer goes through the same steps though, don't worry! 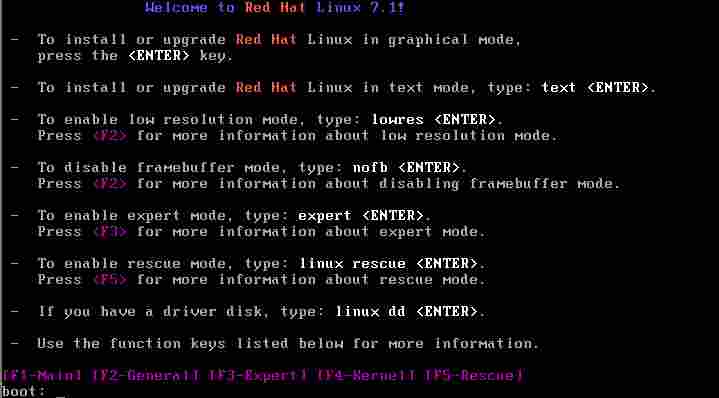
Choosing the language The next screen that you will see is a Language selector, That one's easy. Choose English, or if your native tongue is not English, choose your appropriate language by using the cursor keys. Press RETURN on the language you want to use. Choosing the keyboard layout On the next screen, you will be asked to choose a keyboard layout. Make sure that you choose the correct one for your country or you'll find yourself pressing a @ on your keyboard, when you really want a quote (you get the idea). Workstation Wrangles: Choosing the Installation type 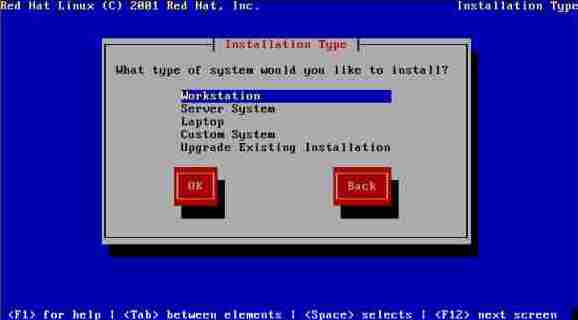 Partition Magic? Let the User Decide!  Red Hat 7.1 brought about an innovative turnaround to the hassles of disk drive partitoning, an area which a lot of newbies found difficult to conquer first time around. Only problem with this 'Automatic Partitioning' is, that it will scrub whatever is on your hard disk drive, so unless you are installing Linux with a bare naked hard drive (No Windows, no nothing on it), or you don't mind it being scrubbed, always choose Manually partition. You will notice at this point, that this and the following few sections in the installation are all about disk partitioning. You may be asking why the installer is dealing with the disk partition, since we have already set it up earlier. The way I have demonstrated drive partitioning (before actually starting the Linux install) is not the norm, but for newbies, I definitely think it is an easier method. We don't need to partition the drive now, all we need to do is assign the root partition label (and others if you wish to do so). Fdisk's fungus and it's less fungus-ridden son  The Linux fdisk is much more horrid (it has to be said) than the Microsoft DOS version of fdisk, and is (for a newbie at least) quite unusable - as it talks of things like cylinders and partition sizes in bytes. You will probably never need to use the linux fdisk program, but maybe cfdisk (it's friendlier alternative), later on in your Linux days. Red Hat and other RPM based installations offer a nice partitioning tool, made for the installation process only, it's name: Disk Druid. Choose Disk Druid for your partitioning efforts. It's a lot easier than it's aging father. The Druid of the Disks  The diagram you see above is a typical example of Disk Druid in use, but notice that this is not the layout that your drive will necessarily take -- certainly not if you were following the earlier suggestion of paritioning. You press the tab key to navigate around the programs buttons and areas. If you are following my suggestion of disk partitioning, you will want to use the edit button on /dev/hda4 (assign it with the label '/' for root). You might need to edit /dev/hda3 and press the button that says Linux Swap, but I imagine that as you have already assigned it Linux Swap status (partition type 82), it should automatically interpret this as the swap partition to use. When you are happy that the Linux / (root) partition has been assigned, and that the swap partition is actually indicating it is the swap drive, press the tab button until it reaches OK and press Return. Formal Formatting: Selecting the partitions to format  Again, this example is taken on my own hard drive, and is not inkeeping with the suggested partition example I have provided for the tutorial, but instead of the installer saying /dev/hda5, it should say /dev/hda4. Make sure that the star is beside it, so that you are formatting the drive, ready for use. Not that arguing sod, LILO is it?  At this point, you can tell LILO (the Linux Loader -- the program that boots Linux on your drive) if there are any special arguments to pass to Linux. Typical examples would be append "ram=256M" and so on, but generally speaking, unless you know a bit about LILO, don't bother passing any arguments to LILO. You can always change LILO's arguments in the /etc/lilo.conf file at a later date. Just press OK here. Mastering LILO  At the moment, presuming you have Windows (or another OS) installed on your PC, it is almost 100% definite that it boots from a very small area of your hard disk drive called the MBR (or Master Boot Record). Yes, this is the infamous area that viruses you download from the net are usually stored, and start up with the computer. Apart from that, it is almost essential that you install LILO, The LInux LOader into the MBR. Don't worry about LILO overwriting your Windows MBR, because LILO is much better than the Windows boot loader: It allows you to boot any number of other operating systems other than just Linux. You'll see what I mean in just a tic. LILO even understands Windows!  By saying, you'll see what I mean in just a tic, I really meant, just a tic: You can see by this example, that LILO's Installer has picked up on the fact that you have a Windows partition on the drive. It labels it DOS by default. The star indicates the default operating system to boot. You can choose dos if you want! ;( If you don't like your windows partition being labelled by LILO as dos, and prefer it to be called something like win98, then you can press the tab button and click on edit, over the windows partition, and edit the name of the partition. This does not affect the booting of the partition in any way. Networking Know-how  Unless you have a network card inside your PC, and it can be automatically probed (IE: it is a Plug 'n' Pray PCI card, such as a 3Com 3c509), you won't see this dialogue. This dialogue lets you set up the basic networking setup of your PC. Let's go over these steps. A lot of this information you may be able to get from your Windows system if you are not sure about what to place in it. Use DHCP/BootP: Unless you have a DHCP or a BootP server on your network (likely in a medium to large corporate environment) you should tick this. Basically, DHCP is a server protocol that issues the following network information to your PC. If you don't have a DHCP server, or if you don't know what this is, make sure it is unticked. IP Address: Use an IP like the one in the example, or one that you are already using on your windows system. Another good IP to use would be 10.0.0.1 through to 10.0.0.254 (for Private Local LAN). Netmask: If you are just in a small business or a house, a subnet is probably not in use. A subnet is a method of segregating areas of a network (ie: you could have 2 computer labs, each on a seperate subnet). Setting up of subnets require a special IP address called a subnet mask. Ask your system administrator for the subnet mask if your place has a subnet in action, or if you are definite you don't use a subnet, use the subnet mask 255.255.255.0 - make sure that it tallies in with all the other subnet masks on your network, or you may run into bothers in computers seeing each other. Default Gateway: If you have a router or another gateway device installed on your network, put the IP of the gateway device in here. This allows your system to use the internet or intranetwork usually. If you have no default gateway, or just use a dialup connection to the internet, leave this field blank. Primary/Secondary/Ternary Nameserver: To resolve hostnames on the internet (or even on a LAN), such as www.bbc.co.uk (a typical hostname), you must have a system called DNS in operation. Your Nameserver IPs are the IP(s) of the system(s) that supply you with the DNS service. This is usually your ISP but if you have a DNS server on your network, use your own DNS server, ask your administrator or ISP for your nameserver IPs (usually you get 2, a primary one and a secondary one). If you only have the DNS from your ISP provider, you might want to consider installing DNS on your own Linux system. Hostname horsearound  Hostname Configuration: give your system a computer name. Your network administrator should be able to help you on this one. If your network's domain name is yahoo.com, you could enter something like john.yahoo.com here. John being the name of your computer. If you don't have a domain name (the .yahoo.com bit), just give it a name (ie: john, no .yahoo.com). Burning Walls of Fire  This step on Firewall configuration is new. It was not around in any of the previous Red Hat installers. This simple dialogue allows you to set up 2 types of iptables firewall: High Security or Medium Security. No Firewall is the other option. Obviously, the less security you choose, the more functional your use of the Internet will be, whereas with a high security firewall, you may not be able to do certain things on the Internet, such as chat on IRC channels, or use/view a webcam, or use ICQ, basically things that are not standard services of the net (ie: web, email, ftp etc). It is your choice here whether you want a firewall or not. And if you know a little about what you are doing, you can press the Customize button to add a little customization to the firewall. If you already have a firewall on your local network (within your gateway), select No firewall, or if you want maximum net usage and or you want to make the firewall yourself later on, select No Firewall. Otherwise, choose either High or Medium firewall. Medium firewall is probably best for people whom want a firewall, but don't want to be burdened with security restrictions too much. Mouse Trap  The next step is to choose your mouse. Your mouse may have been automagically probed and the installer may have chosen the exact mouse type that you have, but usually it fails. I have a Microsoft Wheel Mouse (the one with the scroll thingy in between it's two buttons). I selected Microsoft Intellimouse PS/2. Had I not done this, my scroll button may have not worked without setting it up. There are many different types of mice in the list, including popular types from Logitech, Microsoft and others, but if you can't find your mouse. Use either Standard PS/2 (the small round plug with pins on it), Standard Serial (9 pin female jack), or Standard USB (small rectangular silver connection). You can use the mouseconfig program later on after installation if you need to set up your mouse again later. The Lingo of Linux  You can choose the language you speak here. If you want the system to support more than just one language, you can tick additional boxes, I have selected only English (Great Britain), as I only need GB English support. . If you live in Canada for example, you may want English (Canadian) and French (Canadian). Root's Requisite  An important point in system security is to set a rigid root password. Root is the system administrator for a Linux system -- whom has complete control and access to it, so choose a good password. Something that has no relation to you or anyone close to you. Take something from another language if possible. Reverse it. Put numbers in between characters. Believe me, you want to do this -- if you don't, it is still possible to use a disctionary against a password file, if obtained by a hacker and quickly resolve your password. Not good. If your password is not in the dictionary and it is not obtainable by reversal of characters then you stand a good chance of surviving a password attack. Bearded Unix Nerd No-No Alert: Why you should add more users to your system  Every Unix person will tell you that logging in as root all the time is a definite no-no. To protect yourself against damaging your whole system, and to tighten up security -- it is STRONGLY advised that you make a user account for you and any other people who will be using the system. Only use the root account when you have to. I don't think I have logged into a system as root properly in months. I always log in as a normal user, and if I really have to do something priviliged, I type a command called su. If you type 'su -' at the Linux shell, you are prompted for the root password and you temporarily become root until you type exit. A note to someone making a large amount of users: If you intend on having a large number of users on this system (more than 10, say), then I recommend that you don't set up any users here, as it just stuffs them all in /home. You will probably want to organise them into groups. Ie: people from accounting go into the folder /home/accounting/[username], and so forth. You can do this with something like the KDE User Manager tool amongst others. Security Services  Unless you already have a unix network in where NIS (formerly known as Sun Yellow Pages/YP) is in use, or if you have an LDAP server or if you want to use Kerberos authentication, leave this screen as it is. It would be a foolish idea to untick the use of Shadow passwords or MD5 encryption, as this adds an extra level of security to the password system, which has been a standard since late versions of Linux kernel version 2.0. Pondering on packages  Almost there! - This is the point which I talked about earlier. If you chose the Custom Installation, this dialogue will appear. It allows you to select 'grouped criterias' of packages. For example, the Web Server package installs the Apache web server, including other things like modules for apache like mod_perl and so on. The packages I have selected in this example are what I would imagine as a desirable setup. You may want other things like FTP server, but watch for this, as this allows Anonymous access. My advice on this is to install it if you want, but make sure that you disable Anonymous ftp access as soon as you have completed insallation. You can change the setup for wu-ftp in /etc/ftpaccess. You will find that the Red Hat installer defaults the installation of Dial up Workstation, which is not really needed or desirable for most of us. This allows you to be able to dial your Linux box up with terminal software such as Telix, HyperTerminal or Kermit and work on your system that way. Most people don't want this, so I have ticked this one off. Also, I found that RedHat prefer Gnome to KDE, and thus only select Gnome to be installed. If you have the disk space, definitely tick both KDE and Gnome. Then you can have the best of both worlds. In the graphical version of the installer there is an option around here to choose the resolution of X and also what type of Window Manager. This defaults usually to 1024x768 16bpp, with Gnome. I usually change the resolution up (if I have a better screen) and I usually change the Window Manager to KDE. Do what you prefer. You may remember a little earlier in the networking setup part, I mentioned installing a DNS server, you can check DNS Name Server here if you wish to do this. The packages I have selected in the above list are by no means what you should install, and if you fancy changing it, then you can, but I reckon that you should find most things catered for with that list. I advise that you do not use the Everthing box, as you may find that you install things that you really don't want. Stuff like SQL, Dialup Workstation, Laptop support and Anonymous FTP. Lastly, you will notice the box, Select individual packages. If you consider yourself to have a bit of Linux savvy, and this is not your first ever installation of Linux, you may want to pick the applications one by one, rather than just by group. This is good for removing the crap from the stuff you really want, but beware - it's not really intended for the newbie. Graphics a-go-go  This point is the point where X gets it's server set up. It needs to know what graphics card you have, so it can configure the correct server. Usually the type of card you have is automatically probed and comes up as such, allowing you to choose what monitor you want to use with it, and what colour and resolution you want, but if the Installer can't determine your video card, you'll see the box asking you to select your video card from a list. I have chosen mine: A Matrox Millenium G400. If your card can't be probed, or it dosen't appear in the list then you may have a problem with using X. Try and choose a standard driver if you can find one, or alternatively choose a card close to your own (this may not work well though). If you have bothers with X after the installation of Linux, try visiting places like www.lindrivers.com for information on drivers, or perhaps www.xfree86.org, the XFree86 Homepage for information on seeing if your card is supported. Go for launch, Houston!  This is it! Once you press that OK button, your Linux partitions will be made, formatted and the pacakages you have chosen will be installed onto the drive. Once that has completed, the system will reboot, and you will be presented with the LILO screen - a graphical screen with the Red Hat logo on it, and a box with the titles of the operating systems on your system, typically linux and dos. Use the arrow keys to select the operating system of your choice and hit return on the one you want. Alternatively wait 5 seconds for Lilo to boot the default operating system (you chose this back at the LILO setup part of the install -- changes to this can be made in the file /etc/lilo.conf and issuing the command 'lilo' when done. Well Done!You've Just Installed Linux! Frequenty occuring problems for first time installers A note to those of you who have problems booting Linux: If you only get the following at the time of boot then read on: L LI LILO does several checks (grouped into four areas), and when each check passes, you get a letter of the word LILO at bootup. If your PC hangs at L or LI or possibly even LIL, then this is usually because the system you are trying to boot resides on a hard drive partition where the data is above the 1024th cylinder. Systems just can't boot above 1024 cylinders. Making a small (100MB or so) /boot partition to circumvent this problem usually does the trick, just make sure that the /boot partiton is below cylinder 1024 in your hard drive. You will need to boot Linux up with a boot floppy firstly, and do the following (assuming that /dev/hda2 is your newly made 100 mb partition): #mkdir /mnt/tempboot #mkdir /tmp/bootbackup #mount -t ext2 /dev/hda2 /mnt/tempboot (ok, now our new partition is mounted). #cd /boot #cp * /tmp/bootbackup Backup the boot data, just in case! #mv * /mnt/tempboot move the /boot folder to our new partition #cd / #rmdir /boot #pico /etc/fstab edit the fstab file to include the following entry: /dev/hda2 /boot ext2 defaults 0 0 Save and exit from the pico editor, then: umount /dev/hda2 mount -a You should now be able to see /boot -- but it's on our new partition. Reboot and try seeing if it works. |